How to check a Windows 8 license. How to check a Windows license in several ways. Non-activated, pirated and licensed Windows

How to find out the version of Windows-01
Hello everyone, today I want to write this note on how to find out the version of Windows 8.1, since very often users have to explain where to look for it. We will consider using Windows 8.1 as an example, but these instructions are also suitable for Windows 10 and 7. This information will be useful for diagnosing problems associated with a particular version, so that you can quickly diagnose your computer and understand the algorithm for solving problems.
How to find out the operating system version
As you understand, there are a lot of methods, I will show you the simplest and at the same time effective ones, which can be repeated by any computer user. The first way is to press the key combinations win + pausebrake or properties of my computer (right click on it). Control Panel > All Control Panel Items > System will open and you can see the OS version at the top. In my example, this is Windows 8.1 Enterprise, but this is not enough specificity.

How to find out the version of Windows-02
The second way is to open the window, press Win+R and enter msinfo32

How to find out the version of Windows-03
In the window that opens, look on the right for OS name and note that there is a version field, in my example it is 6.3.9600 Build 9600

Another way is to open the window by pressing Win+R and enter msconfig

You can find the OS version in the download

Well, the winver command, which you need to type in the command line. As a result of executing the command, an additional window will open with the current version of Windows 8.1

There is a method for more advanced users using the Registry Editor. Start - Run or keyboard shortcuts win + r. In the window that appears, type the command regedit and click OK
and in the parameter ProductName find out the Windows OS version. Please note there is a BuildLab parameter and it shows the most complete version.
Another option to find out the version of Windows 8.1 is to enter dxdiag in the window

The DirectX Diagnostic Tool will open.

This is how you can easily find out the version of Windows 8.1, you yourself can remember the method that is convenient for you and use it in practice.
Hello admin. The question is this. My Windows 8 is two years old and I want to say that all this time I have been actively using and installing it a large number of different software and games, of course, now it is in a terrible state and many errors appear, for example, when connecting the Windows Defender antivirus built into eight, an error appears, and when creating a recovery disk, “We are unable to create a recovery disk on this computer.”
Some required files are missing...".
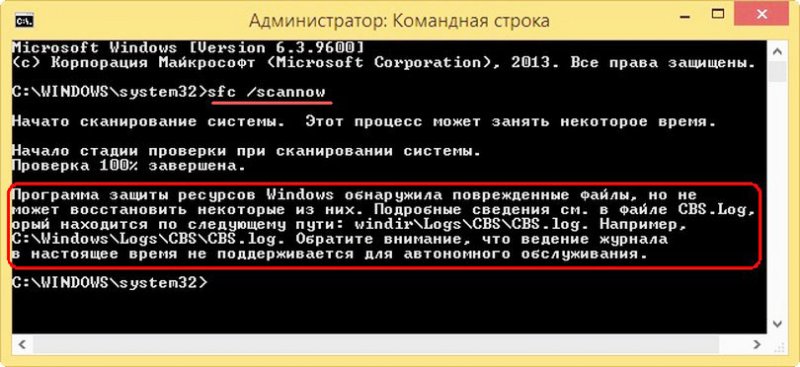
Of course you will advise check the integrity of Windows system files using the command sfc /scannow, but I’ve already done it and I get the error again:
Windows Resource Protection has detected damaged files, but is unable to repair some of them. For details, see the CBS.Log file, which is located in the following path: windir\Logs\CBS\CBS.log. For example. C:\Windows\Logs\CBS\CBS.log. Please note that logging is not currently supported for offline maintenance.
What should I do, I really don’t want to reinstall Windows, can I somehow restore the system files?
And more questions: how to restore Windows system files if it won’t boot?
And where does Windows even get the original files when restoring its integrity?
Checking the integrity of Windows 8 system files
Recovering damaged Windows files using the Dism utility.
Recovering damaged Windows files using the Windows installation disc.
I think all three methods will be useful to you.
Note: sfc /scannow produceschecks the integrity of system files in Windows 7, 8. 8.1 and, if violations are detected, replaces damaged files from a folder specially designed for this WinSxS, this folder stores all the original components of the operating system.
Yes, this happens, for example, you decided to check the integrity of Windows 8. 8.1 system files and opened the command line as an administrator, then entered the command sfc /scannow, and you received this answer
Windows Resource Protection has detected corrupted files, but is unable to repair some of them...
In this case, we use the Dism utility, specially designed to restore damaged components of the Windows operating system, but we will need the Internet, since in some severe cases the missing files will be downloaded to us via Widows Update.
Recovering damaged Windows files using the Dism utility
Open the command line and enter the command
Dism.exe /Online /Cleanup-image /ScanHealth
In my case, Dism detected damage - The component storage must be restored
Enter another command
Dism.exe /Online /Cleanup-image /RestoreHealth
The restoration was completed successfully. The component store corruption has been resolved. That's all! Note: If you get errors when entering these commands, then
Regardless of your operating system (Windows XP, Windows 7, Windows 8), go to Computer (My Computer, This Computer), right-click on the drive you want to check, select " Properties".
In the properties window, go to the " tab Service" and click the " button Run check".

Check both boxes
Automatically fix system errors.
Scan and repair system sectors.
and press " Launch".

If you check the system volume (the disk on which the operating system is installed, usually drive C), you will see the message " Windows cannot verify the hard drive that is currently in use", click " Disk check schedule".

Then restart your computer/laptop; during boot, the process of checking and correcting errors on the disk will begin. It will last from several minutes to an hour (depending on the size of the partition and the physical characteristics of the hard drive). When finished, the operating system will boot.

Checking the hard drive using the chkdsk utility.
CHKDSK (short for check disk) is a standard application in the DOS and Microsoft Windows operating systems that checks a hard drive or floppy disk for file system errors (for example, the same sector is marked as belonging to two different files). CHKDSK can also fix file system errors it finds. (from Wikipedia)
In order to run the chkdsk utility, you need to run a command prompt with administrator rights, to do this:
IN Windows XP click - "Command line"
IN Windows 7 click "Start" - "All Programs" - "Accessories" "Command line" and select "Run as administrator".
IN Windows 8.1 right click on "Start" - "Command Prompt (Administrator)".
As a result, a command line console will open.
First of all, let's find out the syntax of the chkdsk utility:
CHKDSK [volume[[path]filename]] ]
Volume Specifies the mount point, volume name, or drive letter of the drive being checked, followed by a colon.
file name Files checked for fragmentation (FAT/FAT32 only).
/F Correcting disk errors.
/V For FAT/FAT32: output the full path and name of each file on the disk. For NTFS: display cleanup messages (if any).
/R Search for bad sectors and restore surviving contents (requires /F).
/L:size For NTFS only: Set the log file size (in KB). If a size is not specified, the current size value is displayed.
/X Pre-dismount the volume (if necessary). All open handles to this volume will be invalidated (requires /F).
/I NTFS only: Less strict checking of index entries.
/C NTFS only: skip checking for loops within folder structures.
/B NTFS only: Re-evaluate bad clusters on disk (requires /R)
The /I or /C options reduce Chkdsk execution time by skipping some volume checks.
Of all the command attributes, the two most often used to check a disk for errors are /f and /r. The final command looks like this:
chkdsk C:/F/R
With this command we will check partition C, correct errors on the disk and restore information from damaged sectors (if any).
After entering this command, you will be prompted to check the volume the next time the system reboots, click Y and a key Enter.

Now you need to reboot the system, when loading you will see a window prompting a check, do not click anything, just wait 10 seconds.


Checking for hard drive errors using Victoria.
The Victoria program is designed to check for errors on hard drives with IDE and Serial ATA interfaces. The program is a completely ready-made solution for a comprehensive, in-depth, and at the same time, the fastest possible assessment of the real technical condition of the HDD.
First of all, download the ISO image of the program from official website . Unzip the downloaded archive and burn it to a CD/DVD, as described in the article How to burn to CD/DVD . After this, boot from the burned disk, how to do this is described step by step in the article How to boot from a CD/DVD disk or USB flash drive .
After booting from the disk within 10 seconds, select the program for your device (Victoria for the computer will load by default).

The program interface will launch. Press the F2 key so that the program itself finds the disk; if this does not happen, you must do it manually. To do this, press the "P" key. The same will have to be done if the system has several hard drives and you need to select one of them. If you have hard drives with a SATA interface, then in the Select HDD port menu that appears, select - " Ext. PCI ATA/SATA". Move using the cursor keys "up", "down", and select using the "Enter" key.


Next, to check the disk surface, press the F4 key. In the HDD scan menu window: select the necessary scan parameters. By default, it is proposed to scan the entire disk from the beginning of "Start LBA: 0" to the end of "End LBA: 20971520". I recommend leaving these default values. The next menu item – I recommend leaving “Linear reading”, since it is intended for the fastest and most accurate diagnosis of the surface condition. In the fourth point, I recommend choosing the mode BB = Advanced REMAP since this mode checks the disk most efficiently and corrects errors on it without deleting information.

After this, a check for hard disk errors will start and bad areas will be corrected. This procedure can take from several tens of minutes to several hours. Depends on the volume and spindle speed.

When finished, remove the disc from the drive and restart the computer.
Unfortunately, almost any Windows user can encounter various types of errors at any time while using the operating system. Problems can arise both at an early stage of using the OS, if the user did not pay due attention to his computer, and at a later stage, even if the user carefully monitors the cleanliness of the computer. If the computer begins to seriously slow down or does not work correctly at all, it is rational to check the system for errors.
Today we will look at ways that will allow you to check Windows OS for errors and fix them in a timely manner. If you find it difficult to understand the reason for the incorrect or slow operation of your computer, such methods can become a real lifesaver, returning your computer to its former performance.
How to check your computer for errors?
Method 1: Standard Method
A fairly well-known method for finding and fixing errors in Windows, it is already built into the system. Many users (especially beginners) may be put off by the fact that this function is launched from the command line, but in reality everything is not scary at all.
So, first of all, we need to launch the command line, and with administrator rights. If you are a Windows 10 user, then in your case you just need to right-click on the button "Start" and in the displayed list of elements select "Command Prompt (Administrator)" .

If you are a user of a younger version of this operating system, then you will need to open the search bar and enter the query “cmd” (without quotes) into it. The search results will display a result on which you will need to right-click and select "Run as administrator" .

A command prompt window will appear on the screen. For Windows 10, you can immediately copy the command below; for younger versions of the operating system, you will need to enter the command yourself:
sfc /scannow
To start searching for errors, click the Enter key. Please note that the system scanning process can take quite a long time, so be prepared for the fact that the computer must be active during this entire time and the command line must not be closed.

Please note that the running function will first search for errors and then automatically begin to fix them. In the event that you do not want to fix errors, but just want to check system files, the command will take on a new form:
sfc /verifyonly
Method 2: Check the Windows Registry with CCleaner
The Windows registry is one of the most important sections of the operating system, where both the operation of standard operating system tools and third-party programs is described in detail.
For example, when installing a program on a computer, new keys are created in the registry to enable the program to launch and operate. However, it often happens that when deleting a particular program, many entries remain in the registry (and even in computer folders), which over time can lead to a significant decrease in computer performance and incorrect operation of programs.
In this regard, if problems arise with the operation of your computer, it is recommended to check the Windows registry for errors, and the easiest way to do this is using the CCleaner program, the download link for which is located at the end of the article.
Launch CCleaner and in the left pane of the window go to the tab "Registry" . Make sure all checkboxes are checked to the right. Run a registry scan by clicking the button "Search for problems" .

Scanning the registry will not take much time. Once it is 100% complete, click the button "To correct" .

CCleaner will prompt you to create a backup copy of the registry. Be sure to agree with this proposal, because if problems arise with the registry, you will be able to roll back.

Finish cleaning the registry by clicking the button "Correct marked" .

Search for errors in Windows at least occasionally, and you can avoid many problems with your computer.
Hello dear readers.
Today you can often buy a device with software already installed. And sometimes sellers of such equipment claim that an original product is installed on it, demanding additional money for this. Therefore, many people want to know how to check their Windows license so as not to be deceived. Later in the article I will tell you several ways to achieve your plan.
general information
Everyone today has the opportunity to buy a licensed Windows 10 OS or any other version offered by the IT giant for their computer. However, previously this could only be done in official stores. At the moment, a variety of resellers are engaged in selling original software. Despite their status, even in such places there are sometimes products that require special attention from buyers, because for a lot of money you can buy a simple pirated version. The following are the main points that help convince you that you are being offered a truly normal product.
Sticker
The first, easiest way to check Windows 7 and younger versions is to check for the presence of a special sticker. If the seller states that original software is installed on the computer, then the corresponding information should be on the laptop (usually on the bottom cover) or on the system unit. This is what indicates the use of a legal program and not a pirated one.
The laminated paper indicates the key, version and assembly.
Portable device
If you intend to buy a new operating system separately, there should be no problems with verification at all. Windows 8.1 and other versions are offered on portable devices - plastic disks and flash drives. On legal versions, on the box you can find all the data mentioned at the end of the last heading. In general, the sticker indicates the same thing, only the appearance is slightly different.


In addition, the manufacturer applies a lot of holographic icons. This can be seen not only on the box, but also on the portable memory itself. On flash drives, the corresponding drawings are on the covers. They can be found in different places on disc packages. In addition, Microsoft designers have provided protection for the plastic memory itself.
Check by key
Sometimes some become victims of scammers who themselves print the relevant elements confirming authenticity. To avoid falling into the trap, there is a simple way to check.
So, future users need to turn on the device and on the “ Computer» call « Properties" A window will open where the necessary data will be indicated. This is where you need to check the product code. If everything matches, the license is installed.


Otherwise, in place of the letters and numbers there will be an inscription about failed activation.
In addition, the service life of the key installed in the system is indicated here. If this is not the case, the remaining time for entering characters is written. Usually this is given a month. Afterwards, messages begin to appear indicating that you need to undergo the appropriate procedure.
At the same time, some services may cease to perform their functions.
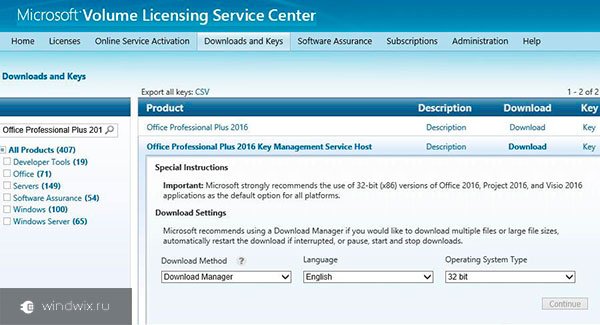
Website
Another way to verify the authenticity of the operating system is to go to the manufacturer’s website. More precisely, you need to enter the appropriate combination of characters in the appropriate line on the web resource.

Important! This cannot be done for Windows XP, Windows Vista and version seven, since developer support is already closed for them.
Pirate build
To identify non-original software, you can use several methods. So, first, go to computer properties. If nothing is indicated in the activation clause, most likely a low-quality product is being used. But usually there is always some kind of inscription here.
Many Win Mobile users dream of checking their device to be sure that they are using the original image.
It is worth noting that today mobile phones with this operating system are produced only by Microsoft partner companies, and therefore they use only genuine software.
Command line
Another convenient way to check system activation is to enter a special combination of characters via the command line. To do this, go to " Start" and in the search bar specify " cmd" The corresponding icon will appear. Call the context menu on it and open it with administrator rights.


A black window will appear in front of users. You need to enter the command in it: “ clmgr /xpr" Next, the operating system will display a message corresponding to the activation status.
If this does not help, you need to indicate in the line: “ cscript slmgr.vbs -xpr" The result should be the same.
In general, all methods are free and legal, so you can safely use one of them or even all of them at once.
I hope you will be able to implement your plans without problems.